
How to Create and Manage a Project in Claude
Learn how to create a project in Claude, add project instructions and knowledge base files, organize chats, and manage projects efficiently.
Claude Projects provide a dedicated workspace, where you can store instructions and reference files for a specific task, team, or topic.
Chats within a project do not share conversation history with each other. New chats use the project's instructions and files, but not messages from previous chats.
In this tutorial, you'll learn how to create a project, add instructions and files, and manage project settings.
Prerequisites
- A Claude account (free or paid)
- Free plan users can create a maximum of five projects
Note: Sharing a project with teammates requires a Team or Enterprise plan. If you're on a Free, Pro, or Max plan, your Projects remain private to you, you can still use all other features in this guide.
Creating a New Claude Project
You can create a project from the left sidebar in Claude.
Use a project when you want Claude to use the same instructions, files, or background information across multiple chats.
For example, you might create a project for ongoing writing work, software development, or a specific client.
For Anthropic's official reference, see How can I create and manage projects.
-
Open claude.ai in your browser.
-
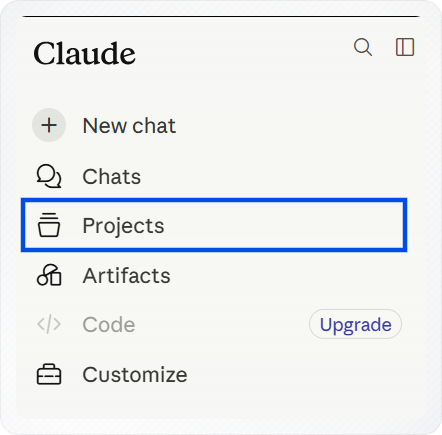
Click Projects.
-
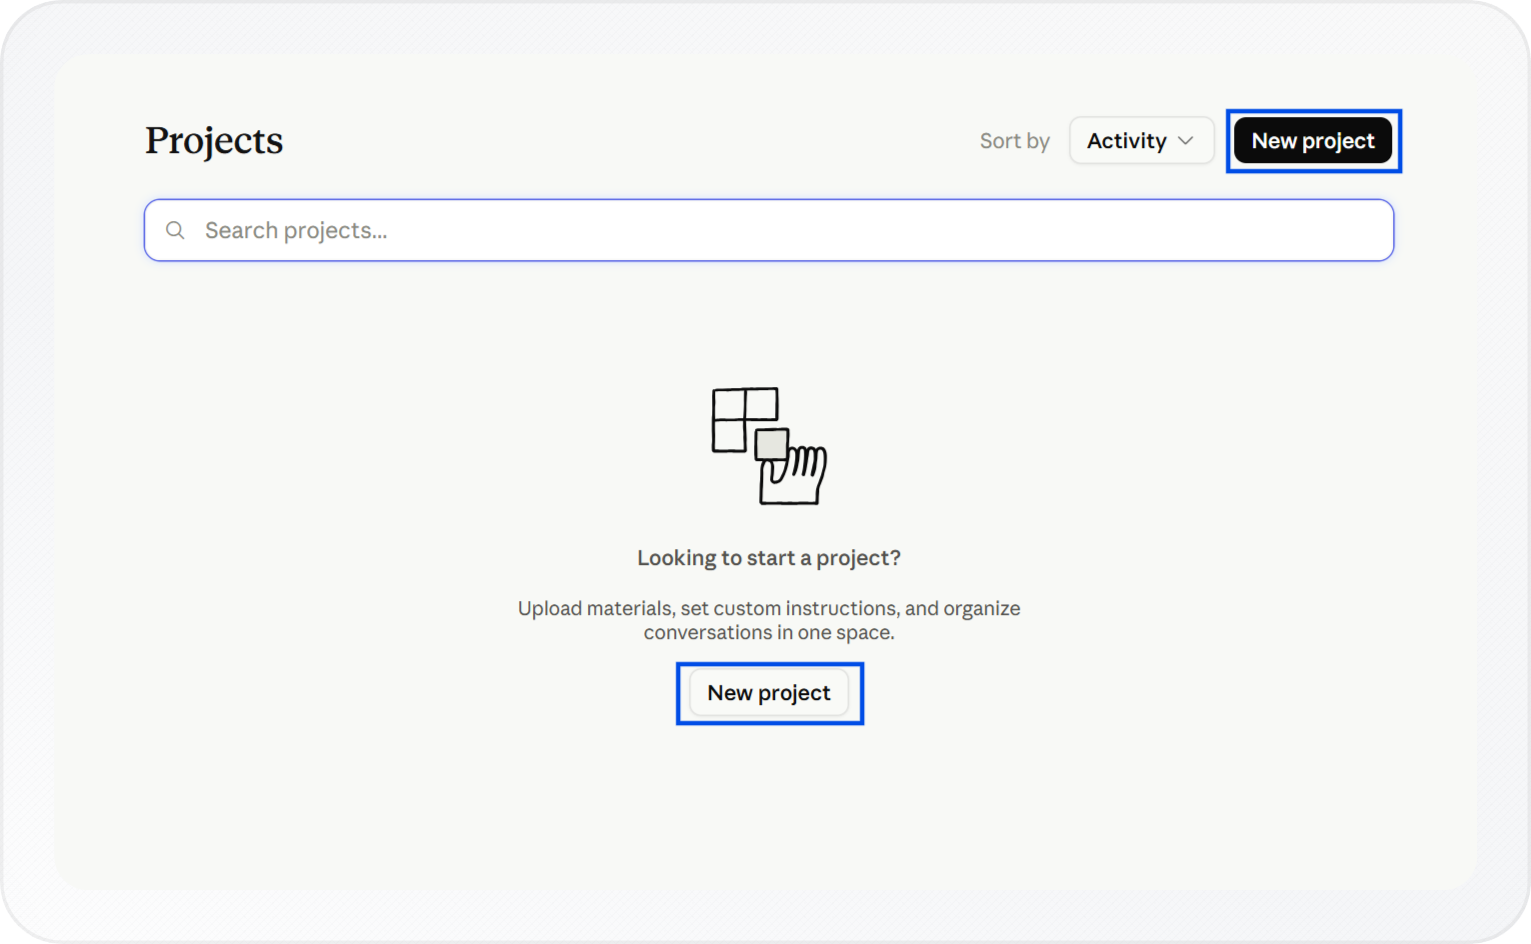
Click + New Project in the upper right corner.
-
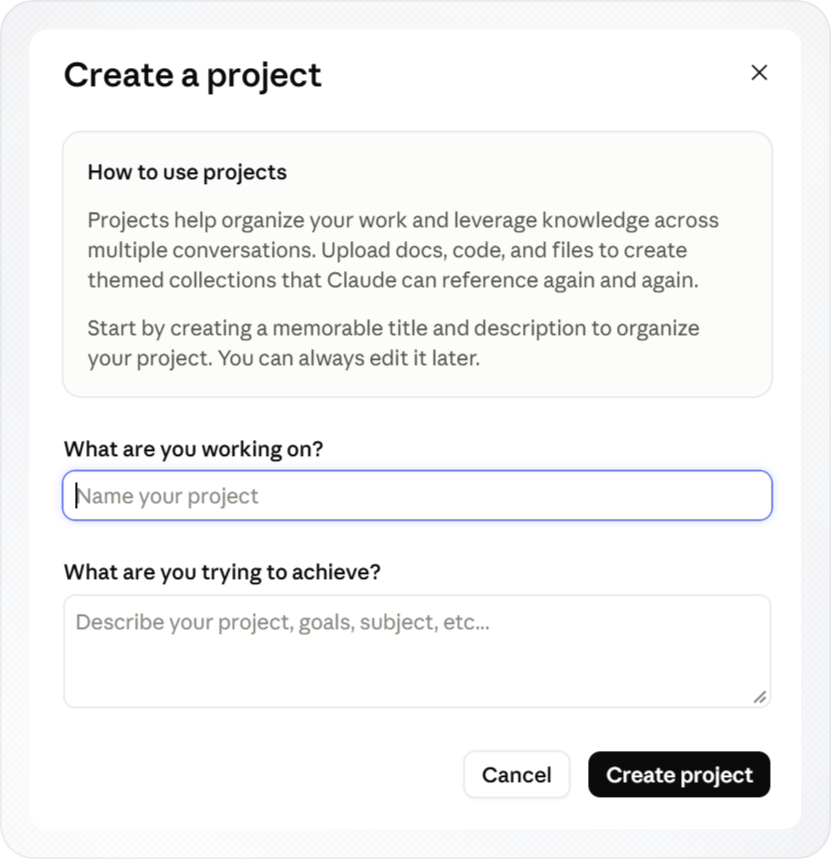
Enter a name and description for the project.
A project name and description are for your own reference only. Claude does not read them. Project instructions, covered next, are what Claude actually follows.
-
Click the Create project button to create and open the project.
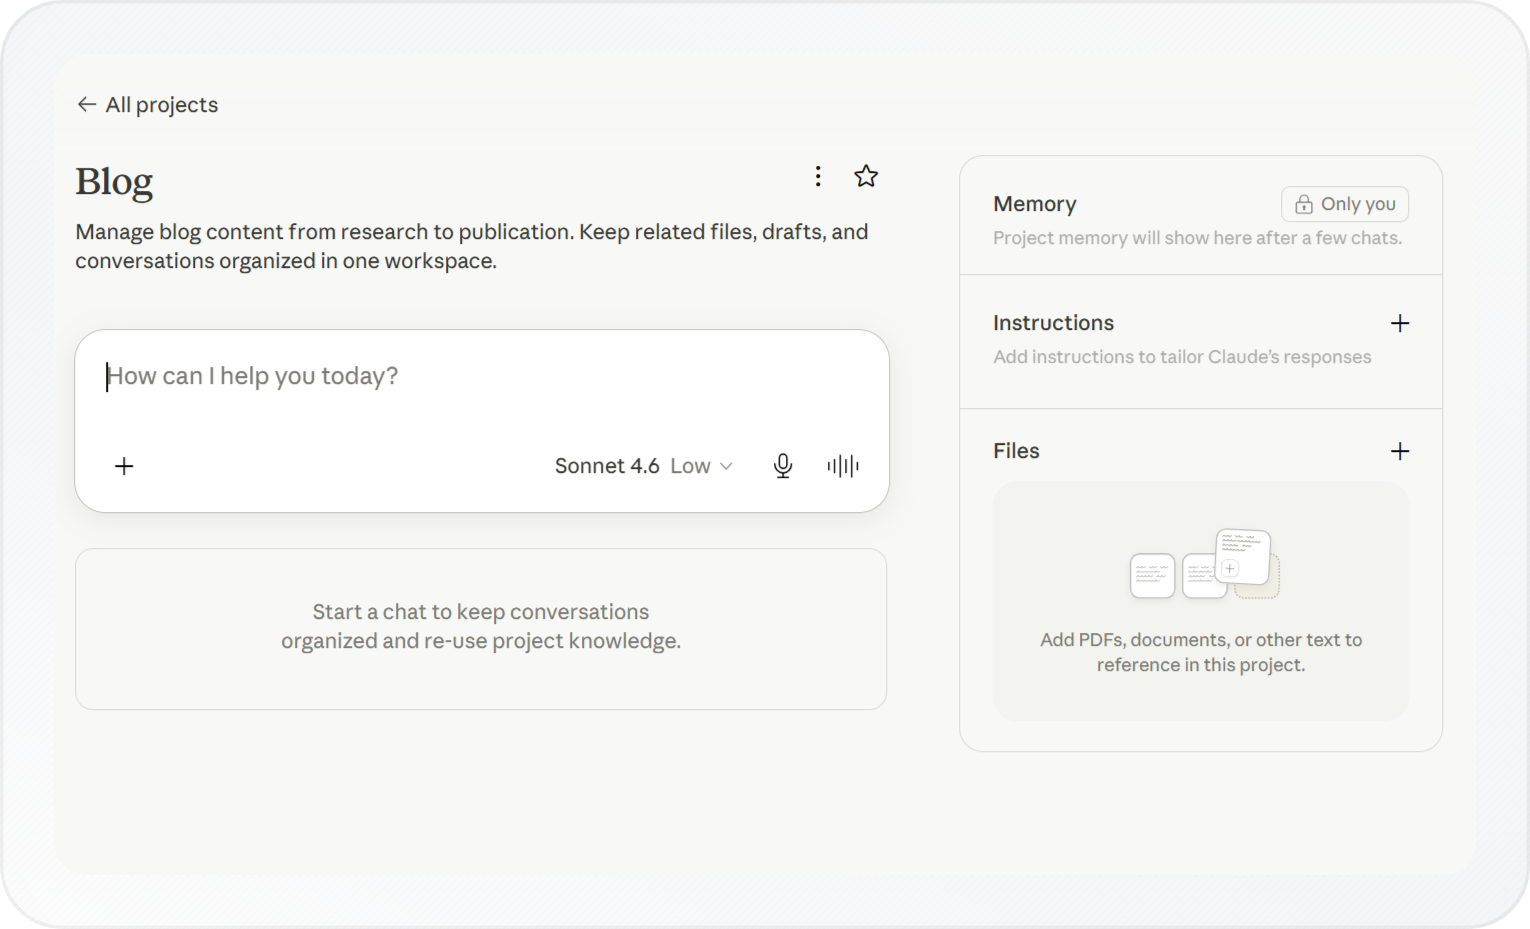
You now have a project workspace ready for instructions and files. You can rename it or update its description at any time from the ... (three dots) menu.
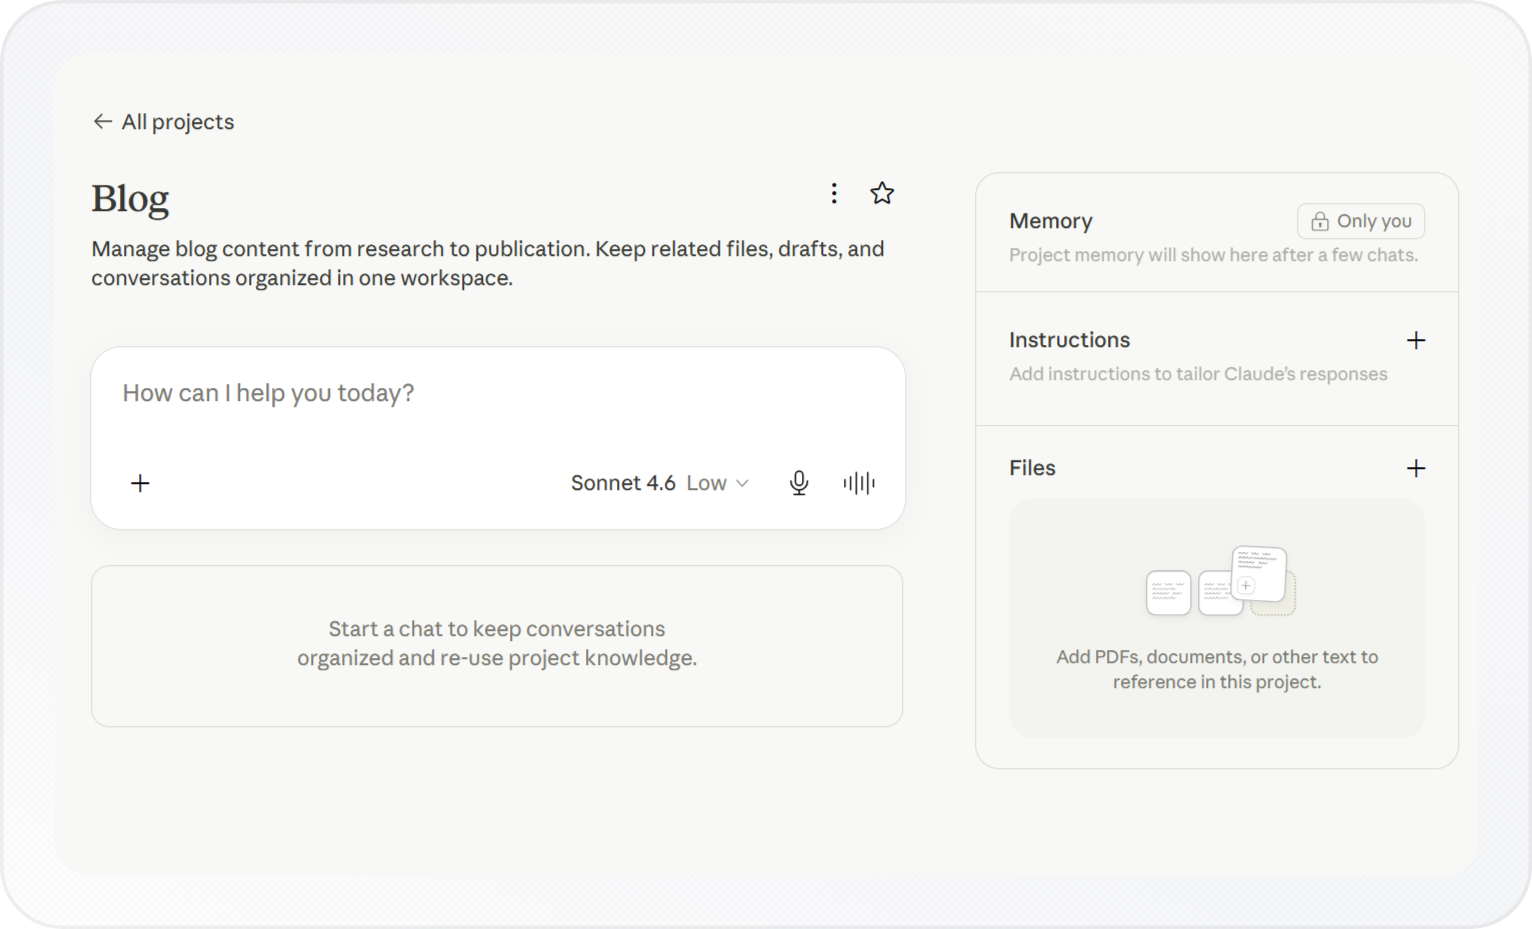
You will also see a Memory panel on the right side of the page. It starts empty and shows "Project memory will show here after a few chats." Claude builds this automatically as you chat. You don't need to set it up.
Next, add the instructions that will shape every chat inside it.
Setting Project Instructions
Project instructions let you set rules that Claude follows across every chat in a project.
For example, you can define a writing style, output format, tone, or workflow. Claude automatically applies these instructions whenever you start a new chat in the project.
-
Open the project. The Instructions and Files panels appear on the right side of the page.
-
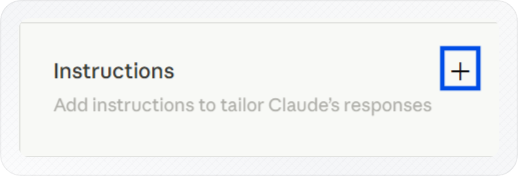
Click the + button next to Instructions.
-
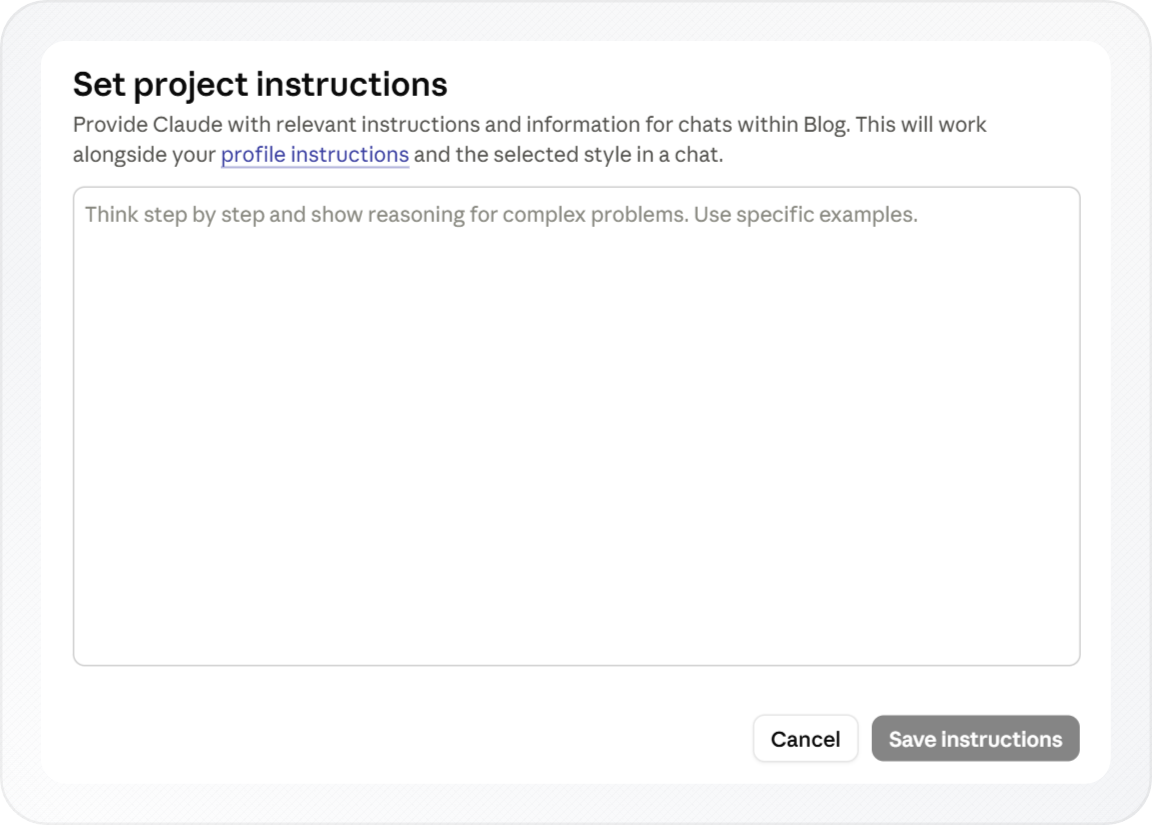
Enter your instructions in the text field. For example, a tone guideline, a formatting rule, or a workflow Claude should follow.
Tip: Not sure what to write? Here is a short example you can adapt: "Always respond in plain English. Use bullet points for lists. Keep answers under 200 words unless I ask for more detail."
-
Click Save instructions.
You now have a saved instruction set that Claude applies to every new chat in this project.
With instructions saved, add the files Claude should read.
Adding Files to the Project Knowledge Base
The project knowledge base stores files and information that Claude can use across every chat in the project. Once you add content, you don't need to upload or provide it again in new chats.
You can upload PDFs, documents, and other text files, paste text directly, or connect a GitHub repository. Claude uses this content as context when answering questions within the project.
Note: Files you upload directly inside a chat are available only in that chat. They are not added to the project knowledge base and won't carry over to new chats.
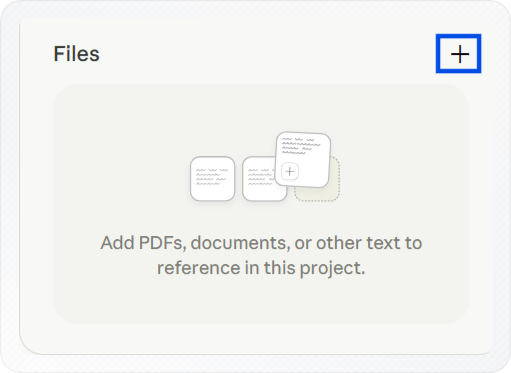
- Open the project. The Files panel appears on the right side of the page.
- Click the + button next to Files.
- Select an upload option from the dropdown.
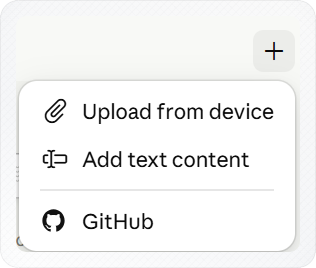
- Upload from device: Select a file from your device using the file picker.
- Add text content: Enter a title in the Title field, paste or type your content in the Content field, then click Add Content.
- GitHub: Sign in to GitHub when prompted, then select the repository and files you want to add.
Files added here count differently toward your limits than files attached in a single chat, see How to Upload Files to Claude for that distinction.
You now have files loaded into the knowledge base, ready for Claude to use in every chat within this project. Files here are not available in other projects or in standalone chats.
Starting a Chat in a Project
Starting a chat inside a project automatically gives Claude access to the project's instructions and knowledge base files. You don't need to upload files again or repeat background information in your prompt.
- Open the project.
- Click the message field that reads How can I help you today?
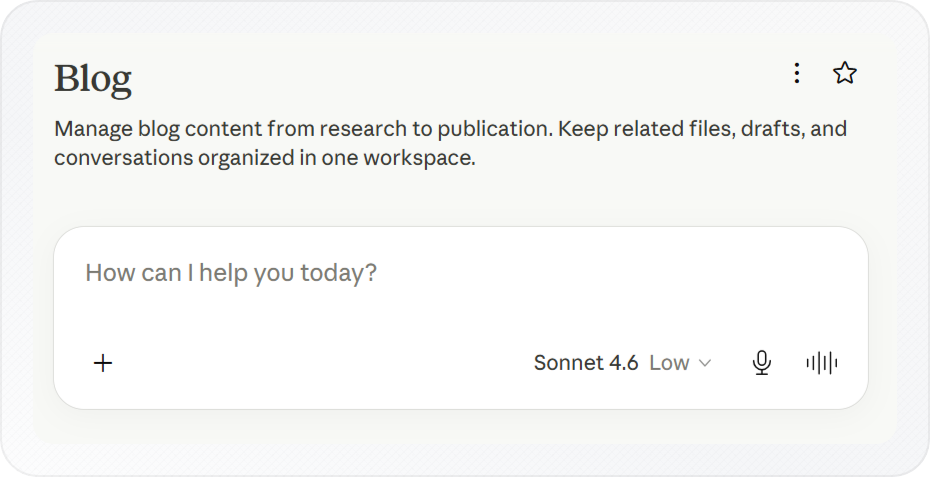
- Type your message and press Enter or click the send button.
The chat opens inside the project with your instructions and files already available to Claude. Every new chat you start in the project works the same way.
You can also move existing chats into the project or out of it. For step-by-step instructions on moving chats from the sidebar or chat menu, see how to add a chat to a project in Claude.
Moving Chats Into and Out of a Project
Move a standalone chat into a project when you started it outside and want it grouped with related conversations. Once a chat is inside a project, you can move it to a different project or remove it entirely.
Note: On Pro, Max, Team, and Enterprise plans, Claude builds separate memory summaries for each project and for your standalone chats. Moving a chat into a project includes it in that project's memory summary. Moving it out returns it to the general summary.
To move a standalone chat into a project:
- Open the chat you want to add to a project.
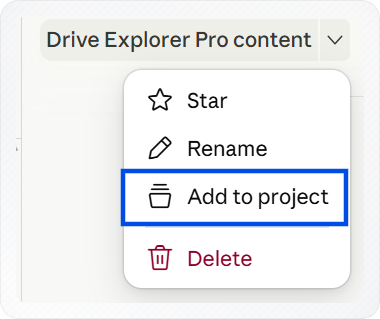
- Click the dropdown arrow next to the chat name.
- Select Add to project. The Move chat dialog opens.
- Select an existing project from the list or type a new project name to create one (for example, "content-blog").
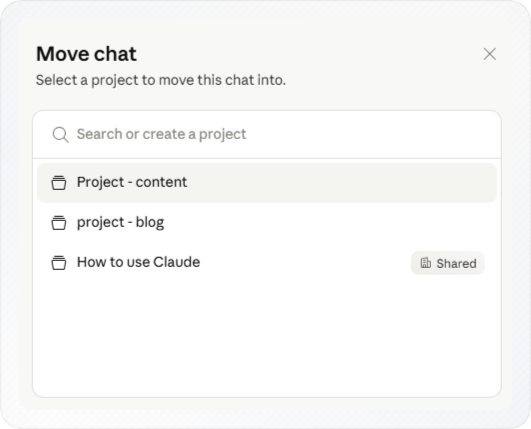
- Click the project name to move the chat.
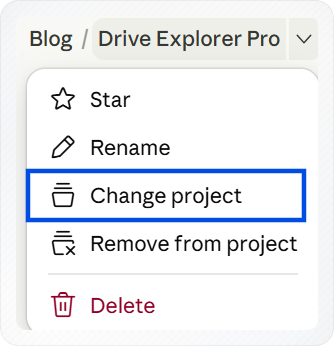
To move a chat to a different project:
-
Open the chat.
-
Click the dropdown arrow next to the chat name.
-
Select Change project.
-
Select an existing project from the list or type a new project name to create one (for example, "content-blog").
-
Click the project name to move the chat.
To remove a chat from a project:
-
Open the project.
-
Locate the chat you want to remove.
-
Click the ... (three dots) button next to the chat.
-
Select Remove from project.
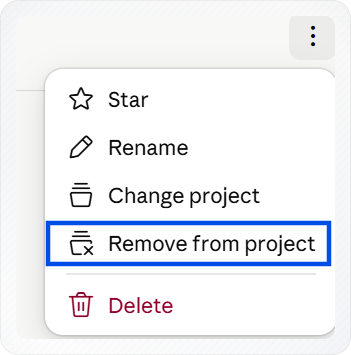
The chat is removed from the project and returned to your standalone chats.
When a project is no longer active, you can archive it to remove it from your active project list without deleting it.
Archiving and Deleting a Project
Archive a project when it's complete but you still want its chats accessible. Delete it when you no longer need it at all. Both options are in the ... (three dots) menu on the project page.
Important: Archiving resets all sharing permissions to private. If you were sharing the project on a Team or Enterprise plan, archiving removes those access settings.
To archive a project:
- Navigate to the project you want to archive.
- Click the ... (three dots) button in the upper right corner.
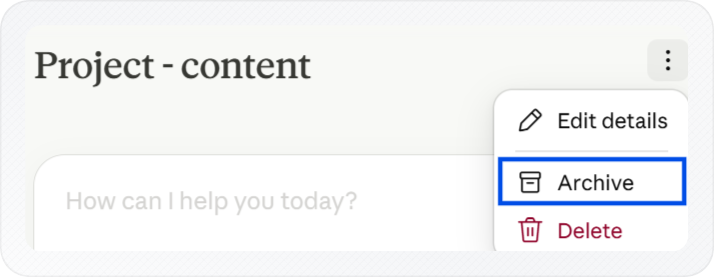
- Select Archive.
- Click Archive in the confirmation modal.
The project moves to the Archived tab on your Projects page.
To delete a project:
- Navigate to the project you want to delete.
- Click the ... (three dots) button in the upper right corner.
- Select Delete.
- Click Delete in the confirmation pop-up.
The project is permanently removed from your workspace.
Note: The Delete option is not available on archived projects. To delete an archived project, open your Projects page, click the Archived tab, click the ... button on the project card, select Unarchive, then follow the steps above.
To understand how Claude builds memory across your projects and standalone chats, see how to enable memory in Claude.
Conclusion
You now know how to create and manage a project in Claude. You can add instructions and knowledge base files, start new chats, move conversations between projects, and archive or delete projects when they are no longer needed.