
How to Upload Files to Claude
Learn how to upload documents and images to Claude on the web using the + button or drag-and-drop, with step-by-step instructions for beginners.
Claude lets you attach documents and images directly to a conversation, making it easy to ask questions, summarize content, and work with files without copying and pasting text.
Once a file is uploaded, you can ask Claude to turn it into a document, chart, or other output, see How to Create Artifacts in Claude.
In this tutorial, you'll learn how to upload files to Claude using two methods.
Prerequisites
- A Claude account (Free, Pro, Max, Team, or Enterprise)
- A file ready on your computer to upload.
Uploading Files in a Chat
A chat is a single conversation you have with Claude on claude.ai. You can attach files to any chat, allowing Claude to read and work with them directly.
Files can be added using the + button or by dragging and dropping them into the chat window. This is useful when you want Claude to work with a document within one session.
For example, summarizing a report or extracting data from a spreadsheet. To keep files available across multiple conversations instead, add them to a Claude Project. Once attached, Claude can access the file's contents throughout the conversation and use it in every response within that chat.
Before uploading, make sure your file format is supported. For a full list of supported formats and size limits, see the official documentation.
Attaching a File Using the + Button
-
Open claude.ai and start a new chat or open an existing one.
The chat input box is at the bottom of the screen.
-
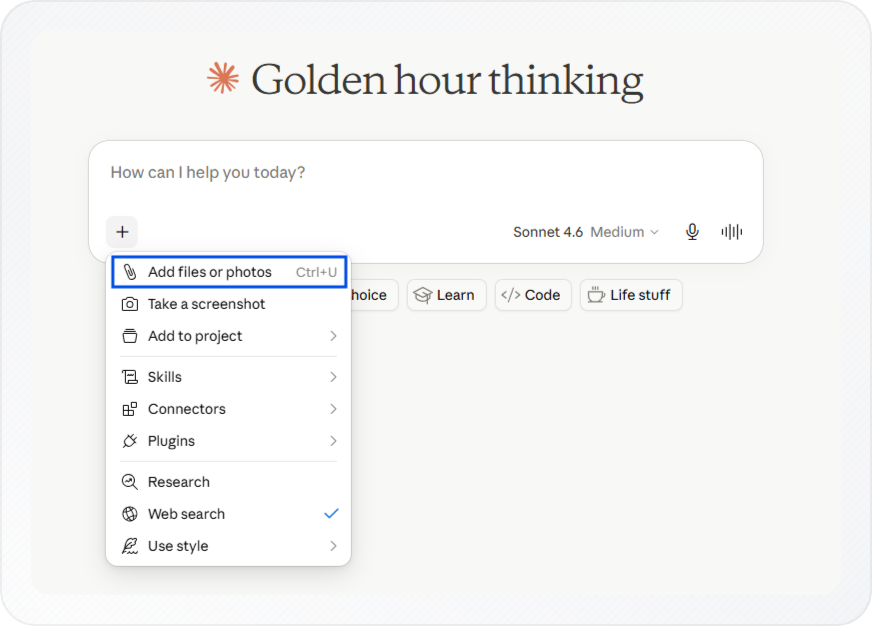
Click the + button in the lower-left corner of the chat input box.
-
Select Add files or photos from the menu.
Your computer's file picker opens. This is the same window you use to open files in any other app.
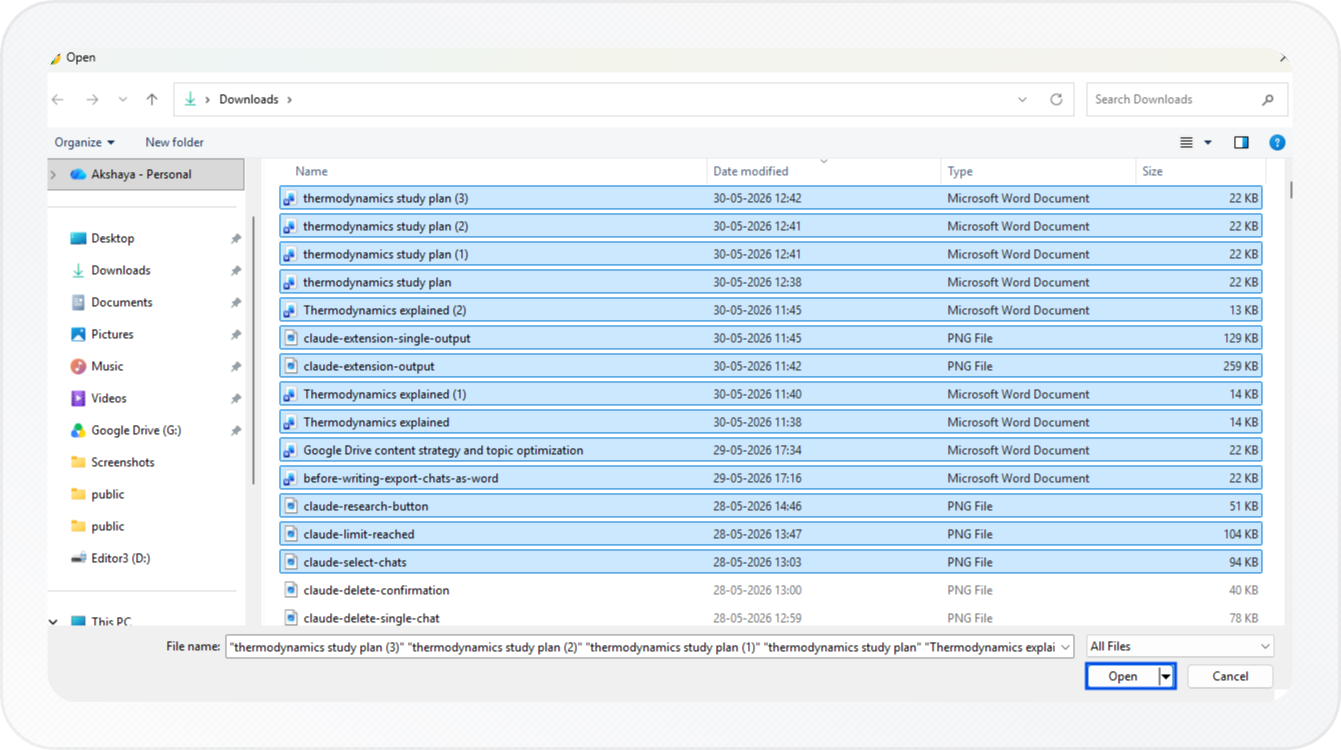
Note: You can attach up to 20 files in a single chat.
-
Select your file and click Open.
The file appears above the message box, indicating that it has been attached successfully.
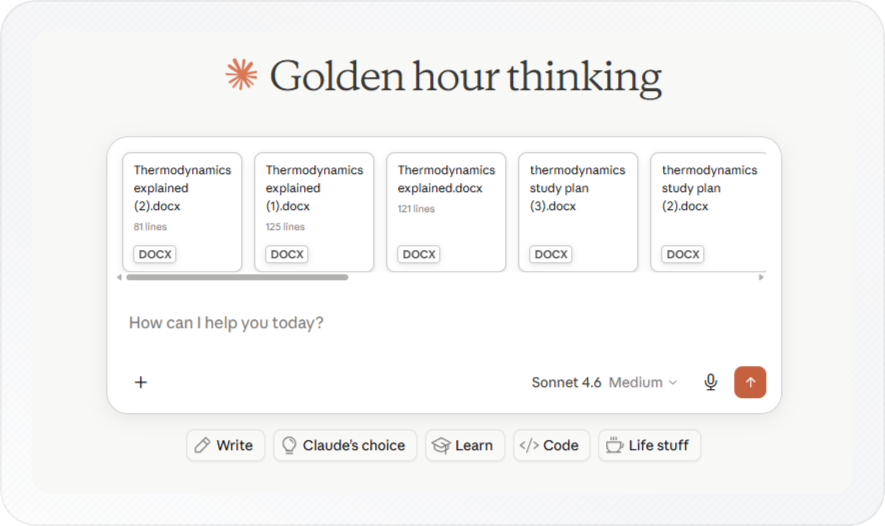
- Enter your prompt and send the message.
Claude reads the attached file and uses its contents when generating a response.
Attaching a File by Dragging and Dropping
Use this method if you prefer not to use menus. It works the same as dragging a file into any app on your computer.
-
Open claude.ai and open a chat.
-
Find the file on your computer in File Explorer (Windows) or Finder (Mac) and drag it over the Claude chat window.
-
Drop the file into the chat window when you see the drop area highlight.
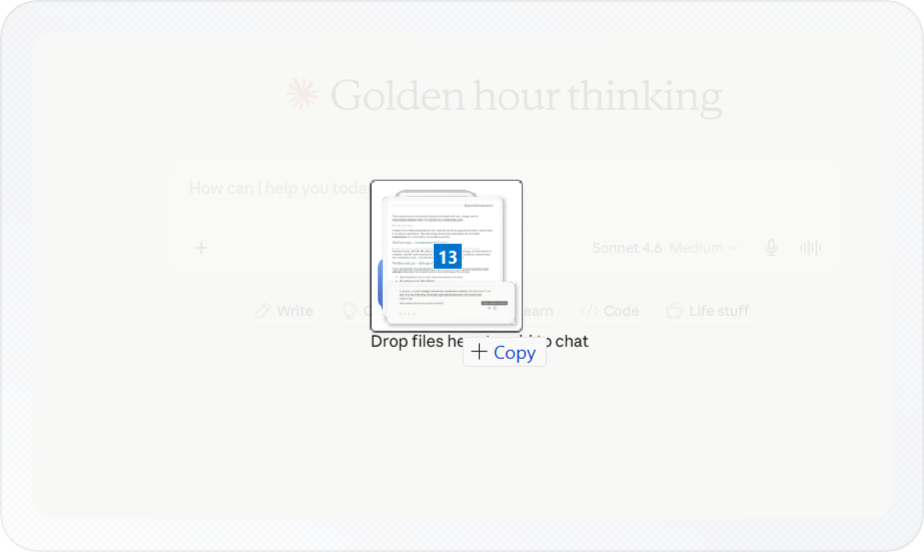
The file attaches and appears in the input area, ready for your message.
- Enter your prompt and send the message.
Claude reads the attached file and uses its contents when generating a response.
Tip: You can also paste an image directly from your clipboard into the chat input box using Ctrl+V (Windows) or Cmd+V (Mac).
To keep the same files available across multiple conversations, you can add them to a Claude Project instead.
Conclusion
You can now attach files to Claude using the + button or by dragging and dropping them into the chat.
Once uploaded, Claude automatically reads and uses the file’s content throughout the conversation, allowing you to summarize, analyze, or extract information without re-uploading it.