
How to Add Plugins in Claude
Learn how to add plugins in Claude on the web, install one from the built-in library, and add a new plugin marketplace when you need more options.
Plugins let you install ready-made packages that add new capabilities to Claude.
A plugin is a ready-made package that can include skills, app connections, and other settings for a specific task. Instead of creating these components yourself, you can install a plugin and start using it right away.
Plugins are designed for common workflows such as sales prospecting, financial analysis, customer support, and project management. They help you get started faster by providing the tools and integrations you need in a single package.
In this guide, you'll learn how to add plugins in Claude, browse the plugin library, and access additional plugins.
Understanding What a Plugin Includes
A plugin can contain one or more of the following components:
- A skill, which provides instructions that teach Claude how to perform a task.
- A connector, which links Claude to external services such as Google Drive or Gmail.
For example, a sales prospecting plugin might include a skill for researching leads and connectors that let Claude access relevant data sources. Once installed, these capabilities become available in your Claude chats.
If the plugin includes a connector, you'll be prompted to connect the external service during setup. The process is similar to connecting Gmail or Google Calendar.
For a complete overview of plugin behavior and requirements, see the official documentation on how to use plugins in Claude.
Opening the Plugins Panel
You can find and manage all plugins from Claude's Customize area. All the methods in this guide begin there.
-
Open claude.ai in your browser.
-
Click Customize in the left sidebar.
-
In the Customize Claude panel, scroll to the Personal plugins section.
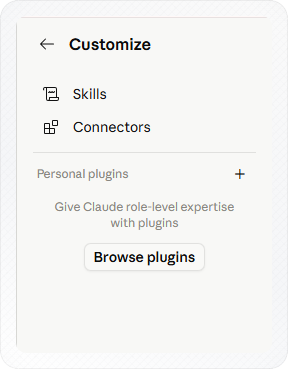
The Personal plugins section shows your installed plugins and provides access to the plugin library through the Browse plugins option.
Browsing and Installing a Plugin
You can install a plugin directly from Claude's built-in plugin library. This method is best when the plugin you need already appears in the directory.
Important: Some plugins may include programs that run on your computer. Only install plugins from sources you trust.
-
Open Customize.
-
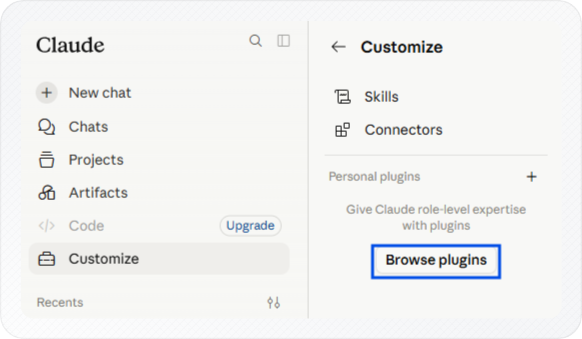
Click the + icon, then select Browse plugins.
You can also click Browse plugins under Personal plugins.
-
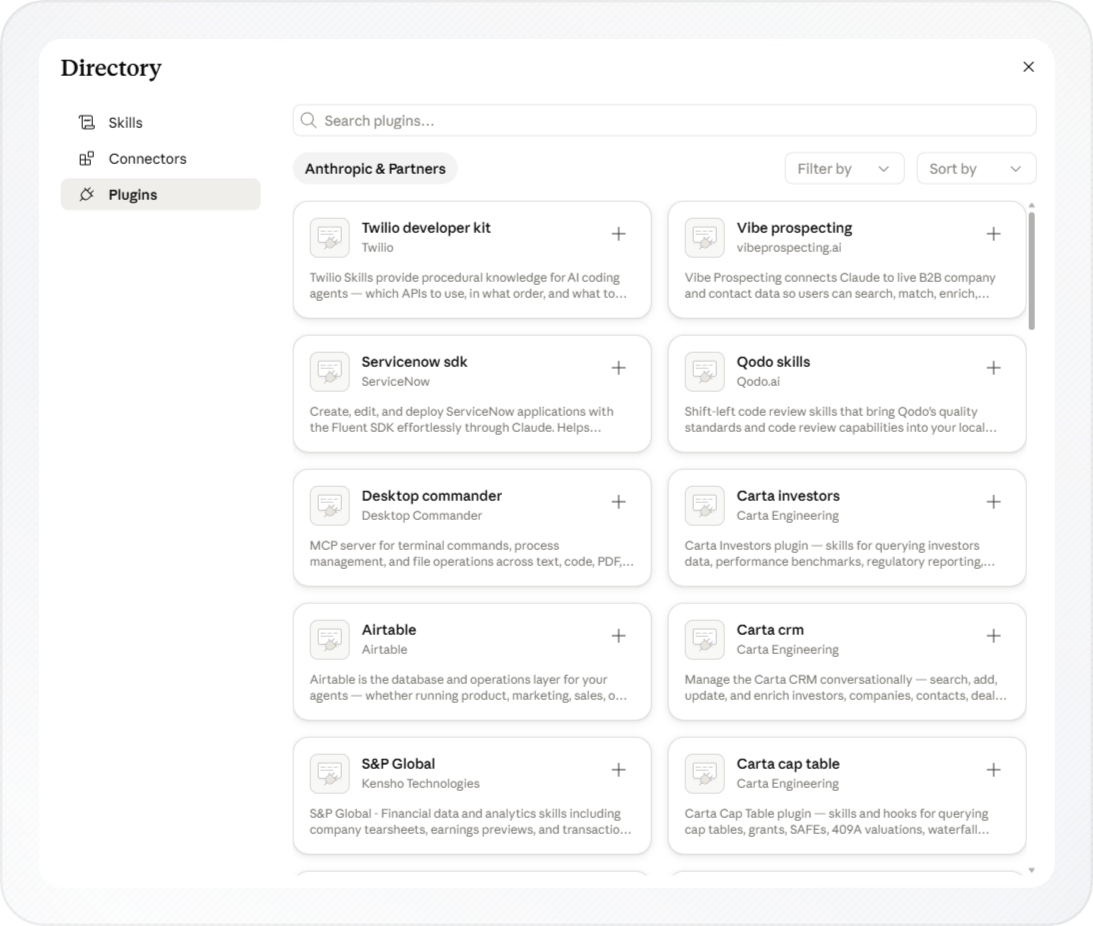
Search for or browse the plugin you want to install.
-
Click the + button next to the plugin to install it.
After installation, the plugin appears under Personal plugins. Its features become available when you start a new chat or open an existing conversation.
If you can't find the plugin you need in the directory, the next section explains how to add another plugin marketplace.
To browse all available skills, connectors, and plugins in one place, see the skills, connectors, and plugins directory.
Adding a Plugin Marketplace
If you can't find what you're looking for in Claude's built-in plugin directory, you can add another marketplace. A marketplace is a collection of plugins that you can browse and install.
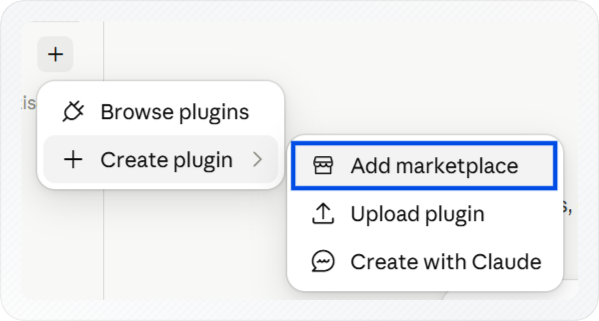
Both methods below start the same way: open Customize, click the + button next to Personal plugins, and select Create plugin.
Note: Although the menu option is named Create plugin, it also contains options for adding plugin marketplaces. You are not creating a plugin when you follow the steps below.
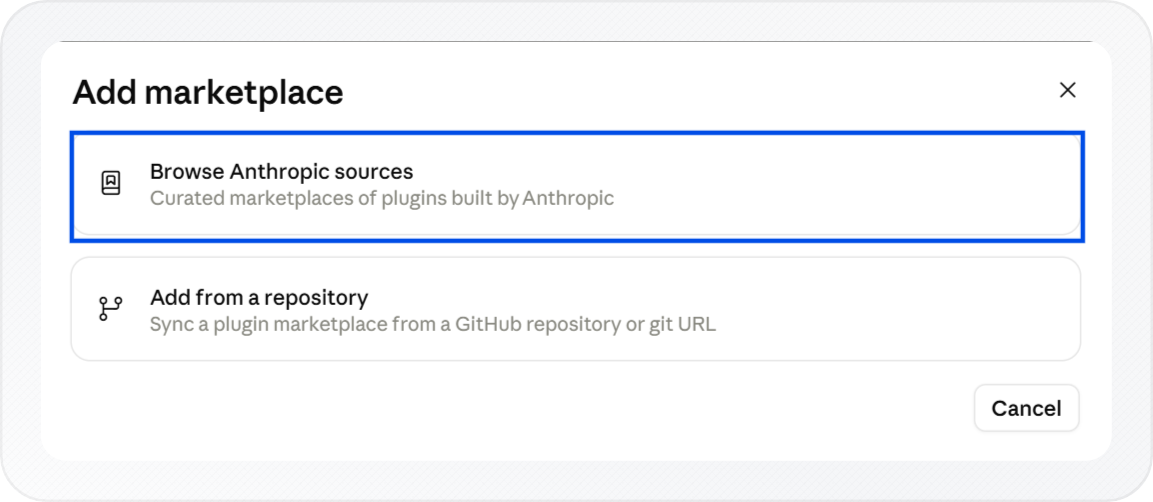
When you select Add marketplace, Claude shows two options:
- Browse Anthropic sources: Curated marketplaces of plugins built by Anthropic.
- Add from a repository: Sync a plugin marketplace from a GitHub repository or git URL.
Browsing Anthropic Sources
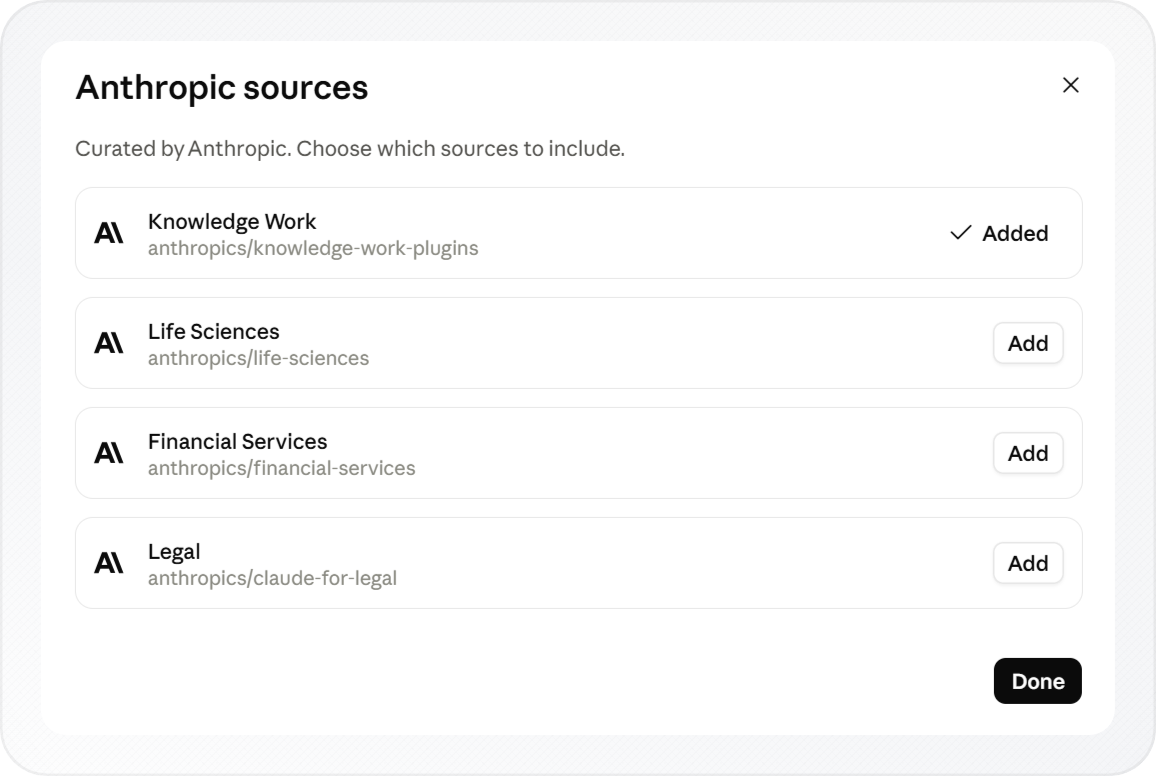
Use this option to add an Anthropic marketplace to your account.
-
Open Customize, click the + button next to Personal plugins, and select Create plugin.
-
Select Add marketplace.
-
Select Browse Anthropic sources.
-
Click Add next to the marketplace you want.
-
Click Done.
Adding from a Repository
Use this option when someone provides a plugin marketplace repository, such as your IT team, a plugin developer, or a software vendor.
Tip: These marketplaces update whenever the owner pushes changes. Only add repositories you trust, as plugins from external sources are not controlled by Anthropic.
-
Open Customize, click the + button next to Personal plugins, and select Create plugin.
-
Select Add marketplace.
-
Select Add from a repository.
-
Enter the repository URL or GitHub
owner/repo(for example,company/plugins-marketplace).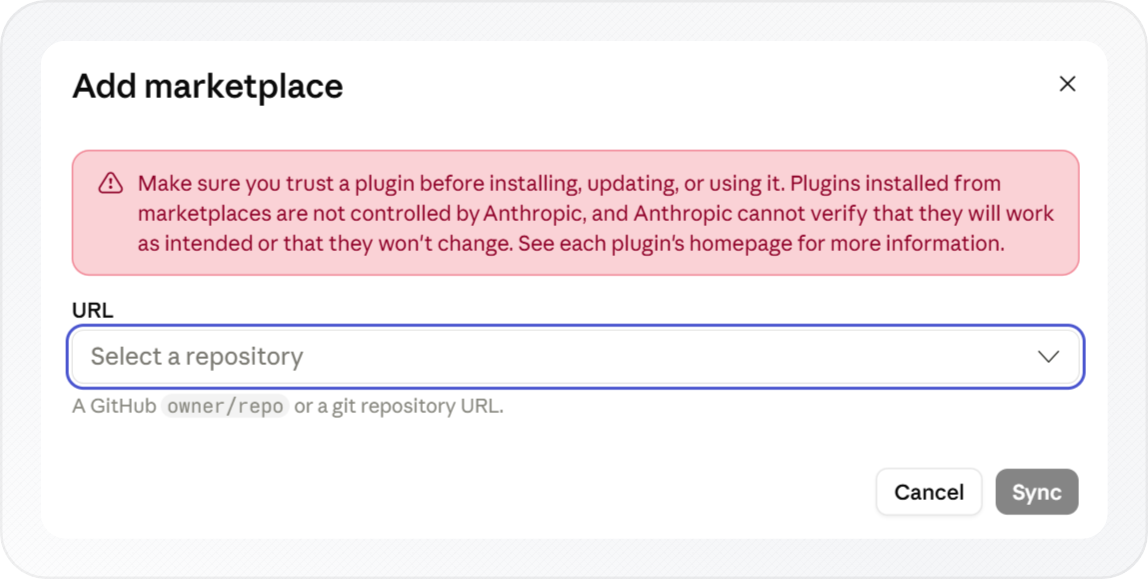
-
Click Sync.
Note: If Claude shows "This repository isn't a marketplace," check that the URL points to a marketplace repository, not a plugin file or unrelated repository.
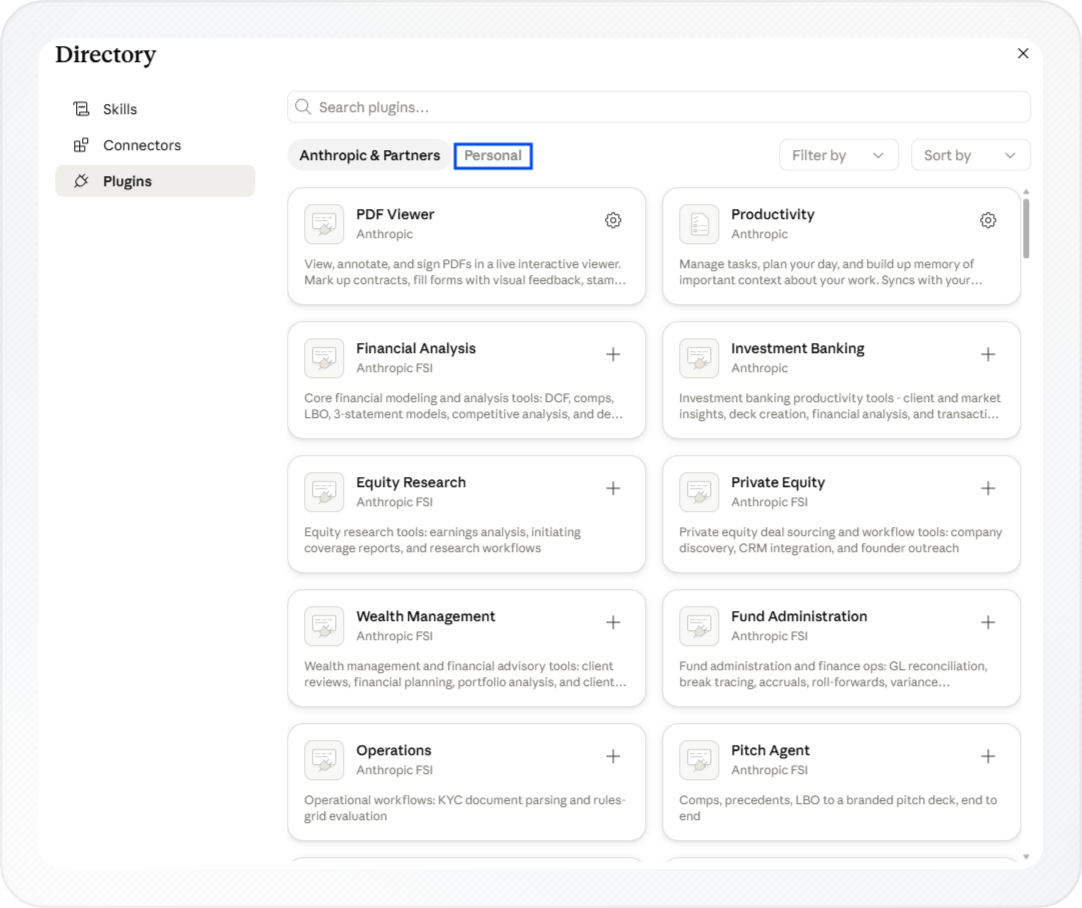
Once you have added a marketplace using either method, open Browse plugins and select the Personal tab to find and install plugins from that marketplace.
The Personal tab lists all plugins from marketplaces you have added.
Using Installed Plugins
Once a plugin is installed, its skills become available inside a Claude chat. You cannot run skills from the Customize panel. Open a new or existing conversation first.
You can access plugin skills in two ways:
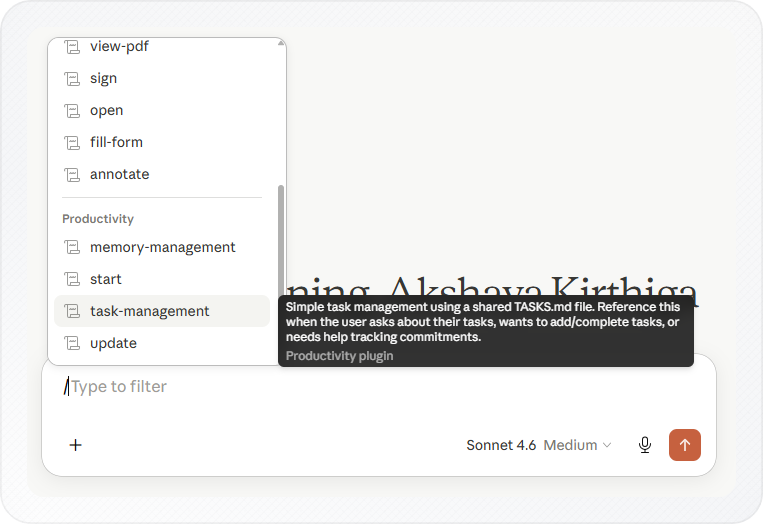
Using the Slash Command
-
Open a chat in Claude.
-
Type / in the message box.
-
Select one of the skills provided by the plugin from the menu that appears.
-
Enter your request and send the message.
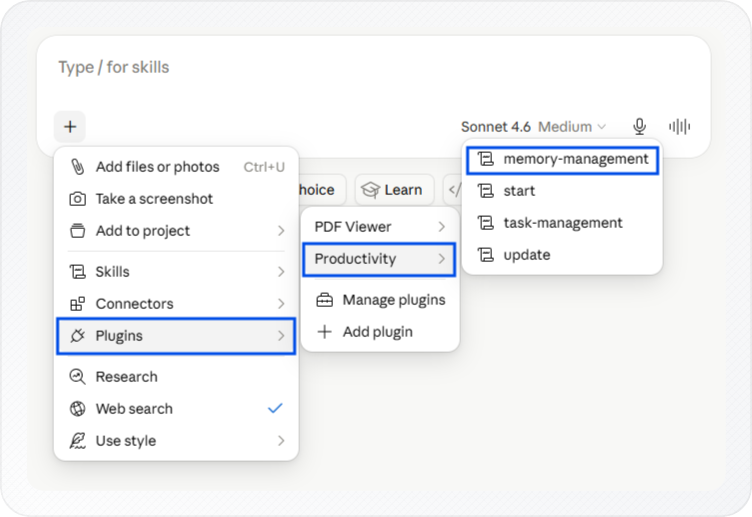
Using the Plus Menu
-
Open a chat in Claude.
-
Click the + button in the message box.
-
Select Plugins.
-
Hover over the plugin you want to use.
-
Select one of its available skills.
-
Enter your request and send the message.
The selected skill runs using the instructions and app connections included with the plugin.
Claude then uses those capabilities to complete your request.
To build your own reusable instructions instead, see how to add skills in Claude.
Conclusion
You now know how to add plugins in Claude by installing them from the built-in library or by adding a new marketplace when the default catalog does not have what you need.
Once a plugin is installed, its skills become available directly inside chat, letting you access complete workflows without manually configuring skills and connectors one at a time.